Showing posts with label #beginningartist. Show all posts

Thursday, October 31, 2019

Plein Air Today - My "9 Suggestions for Beginning Artists" article published

Advice for the beginning artist - OutdoorPainter.com 

I am SO excited and honored! A little over a week ago, I decided to re-work the post I made in September with suggestions for beginning artists. I revised, edited, shortened the article and submitted it to Plein Air Today - an online newsletter - which is part of the Plein Air Magazine family. I emailed it to them late last Wednesday evening. Early the next morning I got a reply that they planned to use the article. Immediately.  At their request, I sent them a separate email with photos, captions, and some "about the writer" information. And just a week later, it was published! 

Click THIS LINK to go to my article in Plein Air Today. Enjoy - and share as much as possible.

Friday, September 13, 2019

9 Suggestions for the Beginning Artist

9 Suggestions for the Beginning Artist

It might seem presumptuous for a newbie artist such as myself to offer advice for other artists, but who would know better what a beginning artist is going through than someone who has recently been through the beginning phases herself? I’ve only been painting for about four years now. All those initial growing pains are still fresh on my mind, and I’m still working on these suggestions in my own art. I’m not going to give you advice about technique or craft. This is about the practical, nuts and bolts of getting started as an artist. They are the things I struggled with at first or that I found to be most helpful to me. So, for those of you who are just embarking on your art journey, here are my suggestions to make the road a little smoother and more enjoyable.

(1)    Create an “Artist’s Statement.” I know . . .  having an artist’s statement sounds all hoity-toity. However, I can tell you that it makes a BIG difference!  Even for an absolute beginner! Your vision as an artist is what drives everything else. The process of writing an artist’s statement is invaluable. It forces you to think through your whys and hows. It will help you solidify your focus and purpose in painting. It will keep you from wasting time on things that don’t fit your vision. Set aside an hour or two, and get it done. Then post it where you can see it when you paint. Here’s a link to a blog post I wrote about how I came up with my own artist’s statement. http://marycarolart.blogspot.com/2019/06/an-artists-statement.html. Check it out if you want to know more about my process.
Be prepared: Your hopes and plans for your art will change as time passes and you paint more, and that means your artist’s statement will change, too. That’s a good thing because it shows that you’re growing.

(2)    Gather the materials you will need. Nothing will kill your desire to paint more than having a great painting idea but not having the materials to follow through. Often, by the time you gather all the materials, that inspirational spark has fizzled. Make a list of the supplies you will need, and then get them. If you don’t know what you need, research it. The internet is a great resource for information, but don’t take one source’s word for it; check out several. Make sure your materials include a sketch book that’s small enough to carry around with you so you can make quick sketches when you find yourself in a waiting room or with time on your hands.

(3)    Set up a dedicated space for painting. It doesn’t have to be a big studio, but it does have to be a space for art and nothing else. You won’t paint much if you must clear away papers, dishes, or toys every time you want to paint. I started out with a desk in a spare bedroom, and later I converted our bonus room into a studio. Your studio is whatever make it; it can be a table in the corner of your bedroom, a desk in the kitchen, or an easel set up in the laundry room.  It can be a spare bedroom, space in your garage, or anywhere that you can create an area just for your art. You will need some type of shelving or cart to keep your supplies. Once you’ve claimed your space, set out the materials you gathered in #2 above and have them ready to be used.

(4)    Take workshops and/or lessons from a variety of artists. Find available classes and workshops by checking out community centers, calling your local arts council, getting online to research, calling nearby colleges and universities, or checking the arts section of your local newspaper. Then sign up for a workshop that most closely matches your own interests.

When you take a workshop, go in with an open mind. I can’t tell you how many times I’ve attended a workshop and seen a student or two so involved in their own painting that they don’t pay attention to the teacher’s demos or instruction. You’re there to learn. Embrace the experience – follow the instructor’s suggestions – try out new techniques and materials – use the instructor’s palette – take notes. When you go home after the workshop, practice what you learned. Keep what works for you. Some things will resonate with you; others won’t. Also, talk to the other workshop participants. Get to know them. They will likely share with you about other art opportunities. If you like the artist/instructor, find out what other classes they teach. Workshops are vital to growing as an artist. Even nationally recognized artists take classes in order to keep learning and growing.

(5)    Get involved in the art community. There is a thriving art community on many levels – local, state, region, national, international. In the few years that I’ve been painting, I’ve added an entirely new dimension to my circle of friends and experiences. Here are some suggestions for involvement. You can’t do them all, but you can pick and choose the ones that appeal to you the most.

a.       Find and join local art groups. Once you’ve joined one or two local groups, get involved. Volunteer to help with shows and paint-outs. You don’t have to be an amazing artist to be involved in the art world. Does your community have “art crawls” each month? One caution: Don’t over-extend yourself. Start small and make decisions about your involvement based on your artist’s statement. Will this group help me reach my goals? Is this group’s vision in line with mine?
b.       Subscribe to and read art magazines. (Fine Arts Connoisseur, Plein Air Magazine, etc.) Regularly set aside time to read them and keep up to date with what’s going on in the world of art. It’s fun to read about all the shows, conventions, and galleries and see the art that other people are producing.
c.       Join artist groups on Facebook, Instagram, and other social media, and “friend/follow” other artists. Artists generally post their work, and you can see what other artists are doing. If someone posts a painting you like, leave a comment telling them you like it. That helps to start building relationships.
d.       Join Associations such as Outdoor Painters Society, American Impressionist Society, Inc., and Oil Painters of America. Find groups for the medium(s) you use. Associations offer information, videos, workshops, paintouts. and competitions. They provide opportunities to network and learn. They also sponsor shows that give you the opportunity to submit your art for consideration.
e.       If you’re interested in plein air painting (painting outdoors), then do your best to attend the annual Plein Air Convention and Exposition (PACE). You’ll be with hundreds of other artists and have dozens of well known artists that provide sessions about elements of painting. Participate in as many of the sessions and activities as you can. 

(6)    Be patient. When I started painting, I wanted to be a great painter IMMEDIATELY! I wanted to instantly know about how to mix colors and how to paint impressionistically! It doesn’t happen that way, though. Learning takes time and practice. You’re embarking on a marathon – not a sprint. Remember that, as you continue to paint, you WILL improve, and you WILL learn. It is through this process that you will develop your voice as an artist.

(7)    Embrace your vulnerability. I can’t stress enough how important this is! It’s what I had to work on the most. When you paint, you are baring your soul and heart. It can be painful to put your art out there where others can comment and pass judgment on it. Every doubt and insecurity you ever had will push itself to the forefront. Don’t let your vulnerability freeze you, though. Remember: Different people = different styles of painting. You are the only you. It can be intimidating to go to that first (second, third, hundredth) workshop where you paint in front of people and where a professional artist/teacher (gasp!) will critique your art. Embrace the fact that you’re human and not perfect. It’s okay to be a beginning artist with much to learn.

I want to share a quick story to illustrate: When I attended my first Plein Air Convention and Exposition (2018), I didn’t know what to expect. It was in Santa Fe, and there were so many people there. I was intimidated because I only knew one other person. I attended lots of sessions and went on the paint-outs but did not participate in the social activities. I felt so out-arted by all the amazing artists there that I ended up isolating myself. When I signed up for the next year’s PACE, I resolved to jump into the activities and participate more. That year (2019), it was in San Francisco, and it was a much better experience. I met more people, finished some paintings, and learned more. At one point when I was walking back to the bus after painting the Golden Gate Bridge from Lands End, I remember looking at the gorgeous scenery and all the artists painting and thinking, “I love this!” THAT is the feeling you’re looking for! And that is the result of embracing my vulnerability as a newbie artist.

I deliberately use the word “embrace” rather than “accept” because embracing indicates an enthusiasm. It’s a good and valuable thing to be vulnerable. Go ahead and post your paintings on your Facebook, Instagram, and Pinterest pages. You are you, and there’s no one else that will paint like you.

(8)    PAINT. Do your art and don’t let anything stop you. We all likely know one or two people who talk about being an artist, but they never quite get around to actually painting. Don’t let that white canvas or panel intimidate you! You are the boss of your art! Sling a little paint on that canvas. Make a commitment to paint every day for a week. Or commit to three days each week. Set a do-able goal and then do it! The simple act of starting a painting is often all that’s needed to get you going. It doesn’t have to be perfect. That’s the beauty of art. You can always wipe off the paint or paint over it.
I was an elementary school reading specialist for many years, and one thing I often told students was that “the more you read, the better you’ll read.” I told them that reading lots of “easy” books” would enable them to move to harder books much more quickly. The same is true with painting. The more you paint, the better you’ll paint. And painting easy subjects repeatedly will enable you to paint more difficult subjects. I will say it again – You are the boss of your art! So get busy art-ing! Throw that paint around!

(9)    ENJOY the journey! Painting will change your life. You will never look at clouds or trees or flowers or even an apple the same way again. You will never see a white cloud again because now your newly awakened “artist eyes” will see all the purples and browns and oranges that are in there. You’ll gain a new vocabulary and start talking about cast shadows, local color, values, chroma, saturation, and shapes. You’ll become an obsessive photographer – always aware of the need to get shots of scenes you might want to paint someday. It’s a lovely and healthy way to live – with heightened awareness of the beauty of the world around you – the textures and colors and intricacies of nature.

Being an artist is a calling – a calling to journey through this life being more observant, more caring, more intuitive. A calling to embrace your imperfections, to explore your world, and to translate your deepest thoughts and emotions into color on a canvas. Enjoy the journey.

Friday, June 7, 2019

Being My Own Art Teacher

At one of the demos I attended during the Plein Air Convention in San Francisco in April, the presenter/artist (can't recall her name) talked about how painting the same scene several times can help you become a better painter.  So I chose this photo that I took on the way to the Viansa Winery outside of San Francisco. It was an old boat sitting in a field of flowers. Who knows why it was there.  It was pretty, though, and so I took a bunch of photos of it.


The first photo below was my first attempt. My goal was to paint quickly and without getting bogged down withe details. I had difficulty getting the boat right, and the flowers look exactly like what I did - just dabbed an orangey-white color all over the grass. 


The second try was better.  I actually got the boat name (Edith) on the boat.  The boat shape STILL isn't right, though - although it's not bad.  The flowers look a little better. Still not happy with it - although this is my favorite of the three paintings I eventually did.

After painting the scene twice, I thought I'd do something different - I'd do it entirely with a palette knife. Hmmmmm. Some people can make gorgeous paints using only a palette knife. I don't know if I even want to develop that particular skill. Palette knives use a LOT of paint - and I have a LONG way to go to make it look right. I got this far with it and decided that palette knife painting isn't for me. So I stopped.  It is interesting that the color didn't look right with the palette knife, and I have no idea why since the tool used shouldn't affect the color - and I was using the same palette of colors as I did with the other two paintings.

Looking at these paintings, I know I need to make the boat a little smaller to make it appear further back in the scene. Most of all, it doesn't LOOK like I want my art to look. I am being too literal in some ways and not literal enough in other ways. I'm still working to develop Mary Carol's art.

I decided to stop after these three tries.  I threw away the palette knife version and will probably throw away the first version as well and only keep the second one. I don't have the stamina or desire to paint the scene a fourth time.  LOL!  I don't think painting the same thing more than a couple times is appealing at all to me. It was a helpful practice, though, and I kinda/sorta like the second painting.

Back to the demo from the PACE19 class. The point was that by painting the same scene repeatedly one, in effect, becomes one's own art teacher - seeing more clearly what needs to be worked on and improved.  I probably should paint this scene a fourth time and follow Kevin Menck's mantra of painting the big shapes and values and see how the scene will emerge. 

Saturday, February 9, 2019

Hillsboro United Methodist Church in Leiper’s Fork, TN


I have always wanted to paint WELL our little church in Leiper’s Fork. Two years ago I started painting it, and I ended up with the painting below.  I like the general look of it except the perspective is off - the part of the church on the left looks like is swinging forward towards the front rather than being straight along the side.  I hung this painting prominently in my studio as a good lesson to always get the perspective right in my paintings.


So this past week, I decided to paint the church again.  This time I used a 10x10 canvas panel.  My thinking was that I'd paint it quick and small and try not to stress over details.  Below is the result:


So the perspective is right.  It's a little "looser" than the first try. Still, though, I am not proud of it. I ran out of room at the top; so it doesn't show the little spire at the top of the steeple. Looking at it now, I realize that in the first painting I added front porch posts that aren't there. I even looked at it yesterday when we went to church, and there aren't posts on the front porch. I like the look of them in that first painting - LOL! but they are imaginary. Still, I like the painting a little - especially if I stand away from it and can't see the details.  LOL! I free-hand sketched it - and although the proportions aren't exact, they're pretty good for a free-hand drawing. I used a different photograph for this painting, although the perspective is just about identical to the first. The sun shadows are different.

I will try painting the church again in another year or two and see if then I will finally get a painting of the church that I'm really proud of.

Monday, February 4, 2019

Dramatic Cloud Study

I took the following photo and wanted to paint the scene - with the clouds being the dramatic focus.


So I painted it. Here is my first attempt. Now, I have had two different "cloud lessons" from Rachael McCampbell over the past couple years - and doggone it, I STILL can't do clouds well.


So, after being totally unhappy with those clouds, I scraped off the sky entirely.


Then I painted it again.


Okay - it sucks. So I left it - figuring that if I let it dry a little overnight, it might work a little more easily.  Right now it's just a mass of paint. "Muddy" is the term that comes to mind. I will tackle it again in a day or two.

One thing I considered was that I used an Ampersand Gessobord for this painting. The Ampersand Gessobord has a very slick surface. Maybe I should have tried one of my Belgium Linen panels. I may re-do this scene on one of those. The other thing is that maybe I'm putting on the paint too thickly. I tend to be overly generous with my paint, and that makes it more difficult to finesse things like clouds. So there are two things to work on for this painting.

Stay tuned for more attempts. I know I can get the trees and the grass and the hay rolls to look right. They don't look right now because I've just blocked them in. But I know how to paint them. It's just the clouds right now that have me stumped.

#Oilpainting, #paintingclouds, #marycarolart, #cloudstudy

Wednesday, January 30, 2019

My Palette

I have learned so much over the past few years as I've taken workshops and classes from so many different artists.  Each of them has his/her own preferred palette of colors.  Kevin Menck has 4 colors - titanium white, cad scarlet, cad lemon, and ultramarine blue.  Kathie Odom has 20 different colors - about 6-8 different reds, blues, and yellows. As I have painted more and more, I've settled on colors that I seem to use more.  I've developed the palette layout that works best for me. It's what I use when I'm at home or doing plein air painting on my own. When I take a class from another artist, though, I tend to use that artist's palette so that I can follow his/her guidance more easily.

I remember hearing an artist that I admire very much comment last year that he can always tell when an artist uses a limited palette because there isn't much vibrancy to the painting. I don't agree with that, but I DO enjoy more colorful paintings. I have proven that I can use a limited palette - and using one has helped me understand color much better.  However, for my own use, I prefer to have more color choices. I like having a couple of each primary color - plus a brown (burnt umber or Van Dyke Brown) and a black (Payne's Gray or Ivory Black), a yellow ochre, and light gray/blue.

On my palette, I place titanium white along the far upper right. Then across the top, I usually keep a cool and a warm red, and a cool and a warm yellow, and, on the top left side, I put a cool and warm blue. Although I can mix purple, I like to have at least one purple simply to save time and  make it easier. And last on the left side are a couple shades of green. The four colors along the bottom are what I call my "modifiers." I use them to modify (darken, lighten, cool down, warm up) other colors.

I keep those basic colors at these locations on my palette.  Then occasionally I switch out colors or add other colors, depending on what I'm painting.  This palette works very well for me.


#marycarolart, #artistpalette, #oilpalette, #limitedpalette, #oilpainting

Tuesday, January 15, 2019

Across the Field

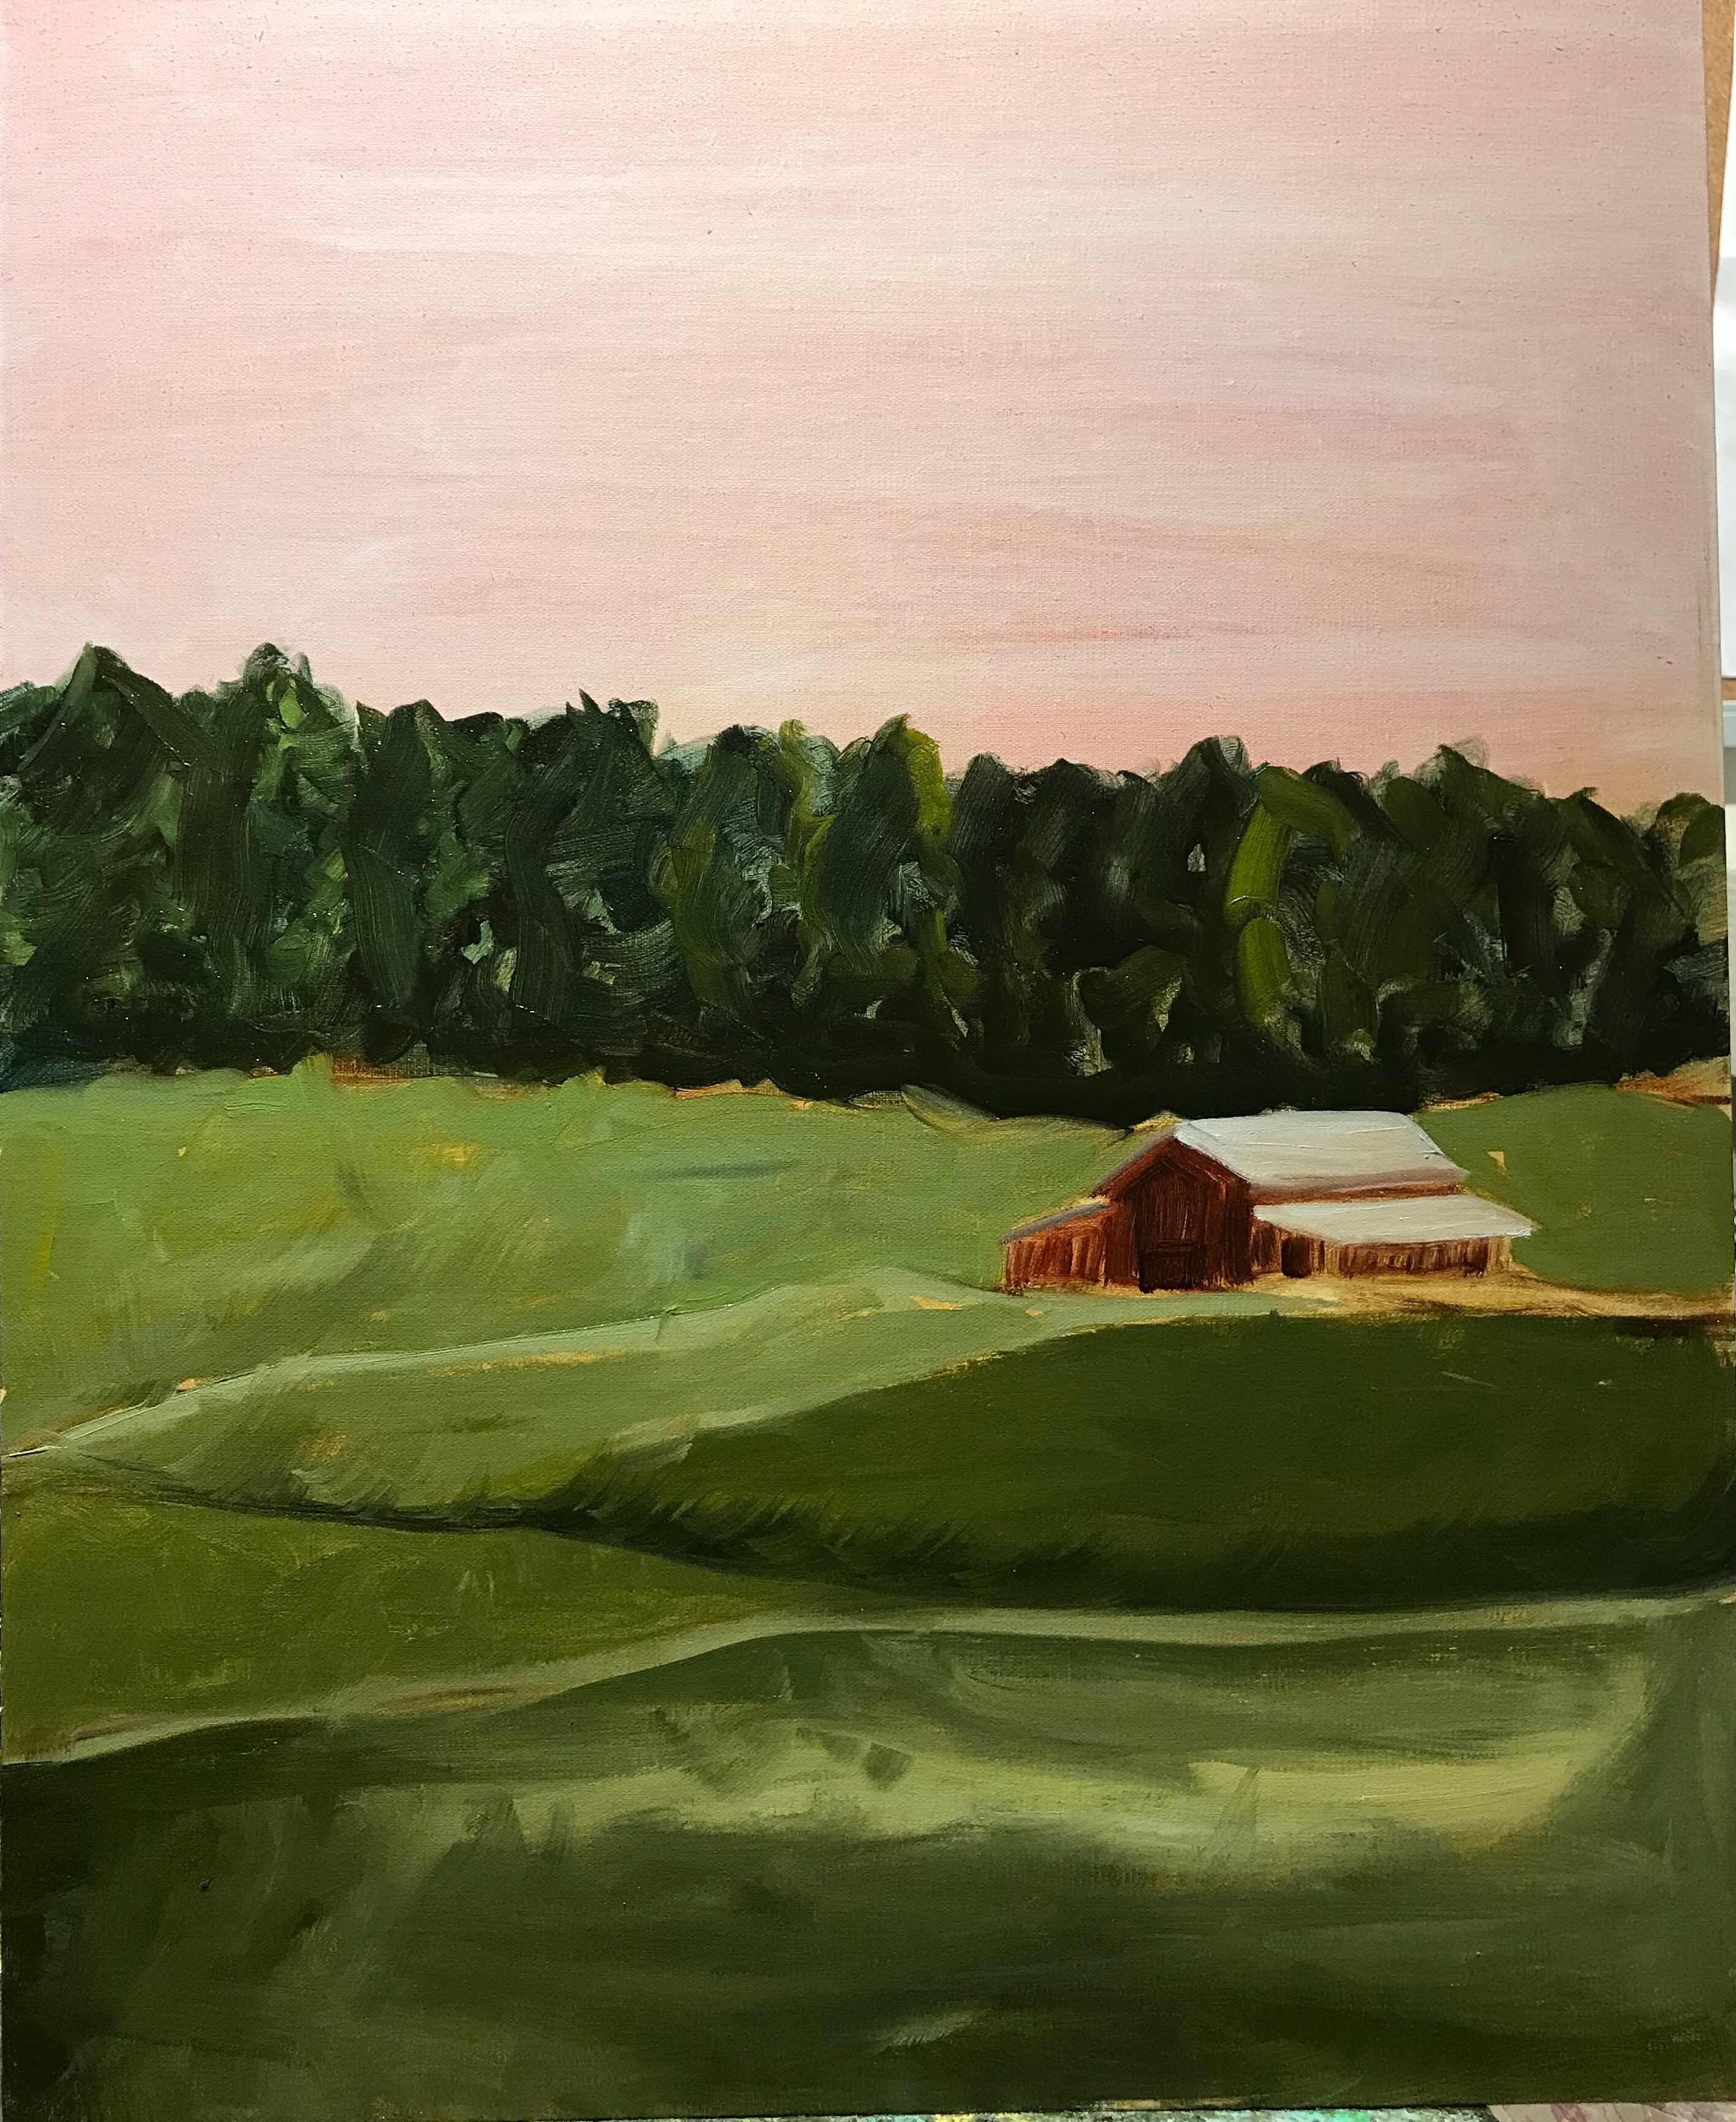
Saturday morning, I went for a long drive.  It took about an hour to drive around the countryside around Leiper's Fork looking for scenes to paint.  I was specifically looking for barns and fields - something similar to what we did in Kathie Odom's class last week.  It was too cold to paint outside - plus I was by myself.  So I was armed with a camera.  I took a bunch of photos, and after I got home, I decided to paint the scene below - which is actually about a mile away from my house on Carl Road.


I first did a wash of brown on the lower 2/3, and a purply-pink on the upper 1/3.  The image below is after I blocked it out and applied the first colors.

The photo below is where I ended things last night.  The issue I see is that I have the trees wrong.  I have it looking like evergreen trees when they aren't at all.  I deliberately cropped the photo so that there was a bunch of sky.  I wanted to do some dramatic clouds to practice what I had learned in Rachael McCampbell's class this past November.  So I made it a very cloudy day.


I have appointments all this morning and into early afternoon (dentist and hair dresser) - and then Disciple Bible study is tonight. So I will only have maybe a couple hours later this afternoon that I can work on it. Three things to work on:  Make the main barn bigger and more squatty - actually mostly just the lower right roof line, make the trees more realistic (not evergreen - although if it becomes too complicated, I can just leave them as they are - artistic license), and work on the sky to make it more interesting and dramatic.

I will take this painting with me tomorrow when I go to Knoxville for Kathie Odom's second mentoring session on Thursday. It will be interesting and helpful to see the suggestions she makes for this painting and also for the painting I did from the class last week.

Later note: Kathie had lots of suggestions for that painting. I don't think she found anything positive about it. Very disappointing. So much "critique" that it was more than I could deal with or even remember.  So I decided to just chuck it. I would rather wait till spring and take a pretty spring photo of that scene and paint that.

Much later note: Although looking at it again, it's not THAT bad. I think it can be salvaged.  I will work on it again eventually.


Monday, December 3, 2018

The Chestnut Group's Christmas Party and Being Brave

I am in a women's group that is discussing Brene' Brown's book The Gifts of Imperfection.  It's a great group and a great book. It is a book I need to read many times until it becomes a part of me - being comfortable in my own skin and not getting hung up on trying to be perfect.  As a friend said recently, "We are recovering perfectionists!" A few weeks ago, in the Gifts of Imperfection group, we worked on creating a personal mantra. Each of us created a unique one. I thought through my goals, and I came up with "Be Brave. Be Real. Be Carol."  So what does Brene' Brown's book and a personal mantra have to do with the title of this post?

The Chestnut Group is a group of plein air painters. There are some amazing professional artists in the group. I have taken classes from many of them. However, any artist can join the group - beginners included. So two years ago I joined. The group sponsors workshops and does a lot of painting to support local parks and environmental projects. It's a good group! This Wednesday (tomorrow) evening, is the annual Christmas party. One thing they do at the Christmas party is each person can bring a small painting wrapped in brown paper. Then they have a drawing - each person that brings a painting gets a painting.

My dilemma is: Do I take a painting - one of my obvious "beginner" paintings and join in the drawing? That's actually the reason I didn't go to the party last year. I felt there was no way I could submit one of my paintings into the same drawing as those amazing artists I know. This year, however, I volunteered to setup for the party because I knew that if I volunteered to help I wouldn't back out of going. I had decided to not participate in the drawing. But then my friend, Sheryl - also a Chestnut - tried to convince me to participate. I said I would.  However, I don't have a painting suitable for the swap.  I want one I'm at least halfway proud of.  I like the "Three Kisses" painting I did in class Saturday - but it is done in oils and is still quite wet.  It won't be anywhere near dry by Wednesday.


So I decided yesterday to re-paint the Hershey Kisses with acrylics which dry within a few hours.  Here is that one:


I don't know. Just glancing at it, I like it - but looking at it closely, there is some unintended "texture" where the paint clumped up. I haven't used acrylics much at all in the past year and a half, and they REALLY dry quickly - well before I'm finished painting. 

However, I'm going to varnish it tomorrow, and I'm writing a poem that I'll print on a large adhesive sticker and put on the back of it - wrap it in brown paper and then BE BRAVE and follow through and take it to the party. That's where my mantra from the Brene' Brown group comes in. I've got to BE BRAVE. Really, even if the best artist in the group draws my painting, they can always toss it if they hate it - or paint over it - or give it away. I KNOW I'm a beginner, and everyone who contributes a painting to the drawing knows there are beginner painters in the group. I haven't varnished a painting yet, but my understanding is that it makes the painting look better - it evens out the finish. So I will update after the party and write how it went.

Update:  I finished the poem for the 3 Kisses painting.  I renamed it "A Kiss Bouquet."  Here's the poem - it's cheesy, (LOL!) but it's the best I could come up with in a very short period of time.

A Kiss Bouquet

A red kiss for love – alive, true, and strong
Hearts beating together – a vibrant love song

Silver is for time – a long life together
Standing solid – through storms and fair weather

A green kiss for change - renewing each day
Still familiar and warm – a “Kiss Bouquet”

I figure that even if a great artist gets my gift, they can always give it to someone they love as a gift.  Or . . . they can always toss it in the trash.

Update after the party:  So the party was a lot of fun. I met a lot of people and enjoyed chatting with other artists. And yes, one of the absolute BEST artists in the group got my painting in the drawing. Seriously, he's an artist that TEACHES a lot, has paintings in many galleries, and has won all kinds of awards. I looked at his website just now - and WOW!  AMAZING ART!  LOL!  So Jim Himsworth - "Portrait Painter and Fine Artist" now owns my "A Kiss Bouquet" painting. WHY couldn't a beginning painter have gotten my painting?!?!??!!! I really envisioned a woman getting the painting - and I had a woman in mind when I wrote the poem - thinking a woman would appreciate the playful nature of painting 3 Hershey Kisses - and then the sentimental type poem.

And I wonder why that bothers me so much. I hate to think that whoever got my painting was disappointed to have gotten a beginner's painting. I have no idea how Jim feels - I'm sure he would say that he really likes it - but I can't imagine that he would do anything with it other than toss it in a corner or in the trash.

So I need to quit obsessing about the fact that a fantastic, experienced and nationally recognized artist got my painting. Let it go. Let it go. Let it go. It is OKAY to not be perfect. It is OKAY to be a beginner painter. I participated in the painting exchange, and that was my goal.

Here's the painting I got in the drawing.  It's pretty.  I took a class on "painting each day" - and one of the things we did was a series of quick paintings of a vase of flowers.  The teacher recommended we use specific boards. I'm almost certain this painting was done in that class because it looks so much like the stack of paintings I have in my studio that I did in that class - and it's painted on the exact same brand/size/type of board that we used in that class.  
I love it.  I had the hardest time with those flowers, but this artist, Claudia Williams, really nailed it.  She was able to paint the flowers with only a few strokes.  We had to do a 40-stroke painting in that class - and maybe this is her 40-stroke painting.  It looks like it could be.

Despite my insecurities about my Kisses painting, I really enjoyed the party, and I will participate again next year.  I will do my painting ahead of time next year and have a nice little landscape to put in the drawing.

Updated 1/30/2019: I mentioned above that I needed to "Let it go!" And time has helped me to do just that. I needed a day or two after the party to get over my "OMG! A great artist got my painting!" angst. Now it really doesn't matter to me. I will definitely participate next year.


Friday, November 2, 2018

The cotton fields of home

I remember throughout my childhood seeing cotton fields as I drove or rode around the countryside in Georgia. Now when I drive to Georgia to visit my mother, I pass quite a few cotton fields. Cotton fields are strikingly beautiful! I love the look of the cottony whiteness covering the ground.  I've stopped several times on my way to or from Georgia to take photos to use in painting. Finally, this past week, I followed through and painted one of the fields.  I painted it while I was visiting my mother. This field in my painting is actually in Alabama - just a few miles from the Georgia border.


I like the trees - I'm not sure about the cotton. Overall, I like it - although I'm not sure I have it where it looks definitively like a cotton field.  It could be a white-flowered field.  There wasn't a creek in my photo, but I felt the painting needed something more of interest. So I added the creek and the rock in the foreground.  Otherwise, it follows the photograph fairly well.  If I "widened the lens" there would be a house on the far left.  I may re-paint it and widen the perspective to include the house. 

Thursday, November 1, 2018

Paintings around our Farm

Here are a couple of paintings I've done around Dogwood Trace Farm - our farm.  The first one is from a photo I took at the bottom of the hill looking up at that distinct tree that is on the right of the path.  Ron says this is his favorite painting of mine because he goes to "the bottom" (the area behind out house at the bottom of the hill next to the West Harpeth River) all the time with the dogs.  So he always sees this tree as he starts back up the hill.


This past summer, Ron planted a lot of wildflowers above the rock wall at the entrance to our driveway.  Butterflies - especially lots of small yellow ones - flew all around the flowers, along with bees.  The mixture of colors was bright and striking. Here is my painting of the rock wall and wildflowers.  It's the largest painting I've done yet - 30 x 40, oil on cradled gessobord.


NOAPS 2021 Associate Member Online Exhibition

I'm happy to say that my painting, "Bear Creek Road Reflections" was chosen to be in the 2021 NOAPS (National Oil and Acrylic ...